Sunday, January 10, 2010

Mad Men Holiday Party

I finally posted photos from a Mad Men party a couple weeks back. What a blast... I got to cater it along with my culinary school classmate Amy. Amy recently started a job as a Healthy Eating Educator at Whole Foods, and of course we focus on healthy eating, so it was a bit hilarious to turn out 60s style comfort food. Not the healthiest (at least I made turkey meatloafs instead of beef), but hey it was the holidays. I was so wrapped up I forgot to take photos of most things, but here's the menu we had:

Apps
Crockpot mini cocktail wieners
Pete's Chip-And-Dip Bowl (homemade onion dip and ruffled potato chips)
Veggie Crudite
Cheese logs
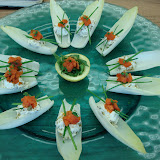
Canapes (Egg salad with pimentos and blue cheese with pecans, rosemary and honey)

Mains
Madison Avenue Meatloafs (I used the Barefoot Contessa's turkey meatloaf recipe but baked in muffin tins for less time, just until the meat therm showed it was done)
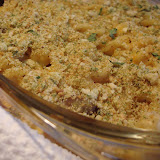
Truffle mac and cheese
Waldorf salad
Green bean casserole with fried onions

Desserts
Chocolate Fondue
Rum-infused Banana Pudding with Chocolate Covered Toffee (A recipe worthy of it's own posting, which I'll try to do soon)
Old Fashioned Candy Assortment (My favorite were the chocolate covered gummy bears)

Tuesday, December 29, 2009

Recipe: African Chicken Stew

I’ve been craving African Peanut Stew since seeing this recipe a few months back. It’s something I’ve made a couple times, including one version in school. But seeing this one inspired me to improvise a new recipe that was better and healthier than any I've had before. Traditionally made with lots of peanut butter, this stew can be rich. My version reduces the amount of peanut butter, amps up the spices, and tosses in lots of flavorful veggies and roasted chicken. To accompany, I served quinoa with shredded coconut, scallions and cinnamon. This is a flexible recipe... toss in whatever vegetables you have on hand, make it veggie only by substituting beans for the meat (I bet garbanzos would be good), play with the seasonings, or switch up the additions to your grain.

Ingredients
Stew-
2 tbsp peanut oil (coconut oil would also be great, or you can use EVOO)
1 onion, sliced in half and then strips
3 cloves garlic, peeled and minced
Ginger, 1 inch piece peeled and minced
½ tsp cumin
¼ tsp cinnamon
¼ tsp ground ginger
½ tsp coriander seeds, toasted and then ground
½ tsp garam masala
Cayenne pepper, to taste (optional)
Jalapeno pepper, chopped (optional)
1 tbsp tomato paste
4 cups chicken or veggie stock
1 sweet potato or yam, cut into ½ inch cubes
½ cup mushrooms, quartered
1 cup canned diced tomatoes (I used Trader Joes with jalapenos)
¼ cup peanut butter (smooth or chunky both work)
Approx. 2 cups roast chicken, cut into small bites
Kale or chard, 1 bunch thinly-sliced (stems removed, these can be added in earlier if you want to use them since they take longer to cook)
Salt, to taste

Topping-
1 small bell pepper (any color you’d like), chopped
Scallions and/or cilantro, sliced

Quinoa- (Bring all to a boil, turn off heat, cover and let sit 15 minutes. Fluff with a fork when done. If liquid remains put on low heat uncovered, stir occasionally and watch carefully so it doesn’t burn)
¾ cup quinoa, well rinsed
1 ½ cup water or broth
Small handful shredded coconut
1 scallion, sliced
Sprinkle of cinnamon
Pinch of salt

Directions
Heat oil over medium in a large pot or dutch oven. Add onion and saute until tender (but not caramelized), add garlic and ginger and cook for a minute. Add spices, tomato paste and jalapeno (if using). Cook one more minute, stirring to combine well.

Add in chicken stock, diced tomatoes and all vegetables except the greens (kale or chard). Cover and simmer for approx. 20 minutes, or until potato is almost tender. Stir in peanut butter, chicken and greens. Cover and simmer another approx. 10 minutes, until greens are cooked. Add salt and adjust seasonings to taste.

Serve over quinoa or other grain topped with the bell pepper and herbs.

6 servings

Sunday, November 22, 2009

Recipe: Palak Paneer Omelet (my breakfast with Madi)

I'm dogsitting. Living the single city lifestyle, I don't usually make it up for breakfast on the weekend, but this week I have my canine companion (Madi there on the left) nudging me at 7am each day. Thus, I saw this drizzly Sunday AM in nice and early and had lots of time to make breakfast. Of course, Madi's kibble entree took priority. But after that, I thought about feeding myself. When I looked in the fridge, a container of palak paneer, Indian spiced spinach and cheese, jumped out at me. Since spinach and cheese are two of my favorite things in omelets, I got creative and used my leftovers as a filling. The result blew me away. Tons of flavor, a nice change to the normal breakfast offerings, and healthy!

You can buy your palak paneer at the grocery store. Tasty Bites makes a good version or get it at a restaurant. Or if you've got the time and ambition, It is actually quite easy to make yourself. It's even simple to make the paneer, and you'll get a huge feeling accomplishment (it's not every day you get to say you made cheese right?!)

Palak Paneer Omelet

Ingredients
2 eggs (preferably free range)
3 tbsp palak paneer
Approx. 4 tbsp frozen chopped spinach (or fresh if you have it)
1 scallion, sliced thin
Small handful cilantro, chopped
Garam masala
Ground ginger
Garlic powder (or 1 fresh clove, minced)
Sea salt
1 tsp brewers yeast (optional)

Procedure

Cook spinach in an omelet-size nonstick skillet over medium heat. Meanwhile, in a small bowl, crack eggs and beat, adding a slight bit of water to ensure your omelet isn't dry at the end. Season egg mixture with sea salt, and dashes of garlic powder and garam masala. Add eggs to skillet and combine with the spinach. Allow omelet to set. Once set, add palak paneer to center and sprinkle with just a touch of ground ginger, as well as half the sliced scallions. Finish cooking omelet and plate. Top with brewers yeast if using, cilantro and remaining scallion. Great served with pita or naan bread.

Thursday, November 19, 2009

Part I: Food Blogger Festival Favorite Things

I was lucky enough to attend the Foodbuzz Food Bloggers Festival a few weeks back here in SF, and have been meaning to do a wrap-up. As I was jotting down thoughts, I realized there's no way I can cover all in one posting so here's Part I of what will be two posts on my favorite things from a phenomenal event. This post covers Alternative Dining Experiences and Healthy Eats. Part II will include Holiday Foodie Gift Sources, Best Wines and Sandwiches (random I know, but I had two of the best of my life there), as well as unveil the utensil from my goodie bag that prompted me to run my "if you could only use one utensil the rest of your life" poll. Here goes Part I...

Top "Alternative Dining" Experiences:
The Outstanding In The Field (OITF) dinner, set in Greenleaf Produce's South SF warehouse and cooked by SF's Namu restaurant. OITF is something I've wanted to do for years thanks to my foodie buddy Michael Thacker. It's a big dinner that feels part flash mob, part wedding feast, part art show, and is mostly just incredibly delicious as the guest chefs use all seasonal, local produce, usually from the farm the meal is held at (to get a better sense check out their photo gallery). In our case, it also felt part rave being in an industrial district, but hey when you have hundreds of people at a city conference a produce warehouse is a damn fine substitute for a farm field! Especially when the food (for pics see my friend Steph's photos here... more on her in a bit) is as good as what Namu turned out -- so good that I went to their actual restaurant this week. It's a neighborhood gem. I saw the same crew working away, they had fun music going, a buzzing crowd and of course the food was delicious again. They also have special nights -- Monday free bar food from 9:30 - 10:30pm, Tuesday free cab ride on them, and Wednesday there was something too which I'm blanking on (sorry!).

ForageSF -- So we didn't actually have a ForageSF dinner, but I did have the pleasure of meeting founder Iso Rabins, which I enjoyed because I'd been to one of his dinners at Radio Africa Kitchen. His dinners (and Radio Africa Kitchen) are both additional fabulous alternative dining experiences. Iso forages for wild ingredients like seaweed, mushrooms and shellfish. Then a guest chef turns out a feast using the wild food. If you're local I'd strongly recommend you sign up to keep in the loop, I just did!

Healthy Eats:
Steph Chows -- Steph and I enjoyed hanging out throughout the Festival. She's got the most vivacious personality yet in a very down-to-earth way that I kinda miss from growing up in Wisconsin... she's good to the core, and she likes to eat healthy like I do! But we have a very similar perspective -- eat healthy most of the time and workout, but enjoy your food and splurge sometimes too (see her peanut butter and chocolate bread pudding muffins for a splurge-worthy recipe). We were both huge fans of the lavender raw cheesecake we tried from Alive (more on them next) and I knew I adored her when she went back for seconds of the Strauss ice cream and we discussed our mutual adoration for the coffee flavor. I must admit to being intimidated by her blog it's so well-written and got such character. I aspire to be like her someday... make sure you check it out. She even put a nice photo of us about halfway through her wrap-up, and the photo here of us was hers too!


Alive Restaurant -- I thought I'd tried all the raw/vegan/healthy restaurant options in SF. Turns out I was missing one very impressive option. Alive served a couple savory options and a sweet treat at the Friday dinner, and their food was outstanding! I can't wait to get to the restaurant to try it out. The raw cracker with avocado on top and raw cheesecake were favorites of mine. Even though there was tons of bad-for-me food around like pizza and cup cakes, I would have happily filled up on those.

Friday, November 13, 2009

Recipe: Herb-roasted Butternut Squash with Chicken Apple Sausage

With holiday parties and potlucks starting, I wanted to share a recipe I made for my Stanford Womens Alumni Club neighborhood potluck dinner this week. This group is the most vibrant, lovely gathering of women alum of all ages. I love the intergenerational exchange of stories, heated discussions on current happenings, and delicious sharing of favorite recipes!

When the invite came I thought of winter squash and apples since both are in season. In the past, I’ve roasted butternut squash halves with an Italian sausage and apple filling, so was considering something similar. A recipe search, however, turned up the following dish which takes the squash and roasts it cubed, along with plenty of herbs and pieces of pre-cooked sausage. It’s a tasty recipe as is, but I wanted to add my own character. I used truffle oil, lots of the fresh herbs and additional dry herbs as well, tossed in apples along with some shallots (I adore them roasted and thought it would be a bigger crowd pleasure than garlic), used the chicken apple sausage as suggested, and gave the whole thing a big sprinkling of black truffle salt.

This recipe is versatile, healthy, and can be made ahead so it’s a good one for all the upcoming festivities! Any mix of things could be tossed in really. It would be great also with red peppers, broccoli, other squashes or sweet potatoes, etc… I doubled the quantity for our group of 10, and the roasting time increased to about 45 minutes so beware you may have to adjust your cooking time. Enjoy!

Herb-Roasted Sausages and Butternut Squash

Adapted from Bon Appétit, December 2003

Yield: Makes 4 servings

Ingredients
6 cups 3/4-inch cubes peeled butternut squash (about 1 1/2 pounds)
1 pound purchased fully cooked sausages (such as chicken and apple), cut into 1 1/2-inch pieces
8 garlic cloves (or 6 shallots, peeled)
3 tablespoons flavored olive oil (such as roasted pepper or herb, I used truffle oil) or regular olive oil
1 tablespoon chopped fresh rosemary
1 tablespoon chopped fresh sage
1 tablespoon chopped fresh thyme
Salt and pepper, to taste
1 1/2 tablespoons balsamic vinegar

Preparation

Preheat oven to 450°F. Combine squash and next 6 ingredients in large roasting pan. Toss to coat. Sprinkle with salt and pepper. Roast until squash is tender and sausage is warmed through, stirring once, about 30 minutes.

Transfer squash and sausages to platter. Drizzle with vinegar and serve.

Saturday, November 7, 2009

Recipe: Best Veggie Sandwich Ever


One of the bloggers I met at this weekend's Foodbuzz Blogger Festival was Brittany from Eating Bird Food. She won a recipe challenge from Nature's Pride bread for this sandwich. At first glance it doesn't sound unusual. Hummus and veggies, we've all had that, right? But the hummus is white bean and basil, plus the sandwich gets amazing flavor from feta and peppadew peppers. Brittany told me she got these peppers, which are miniature and red, from the olive bar at Whole Foods. This is one of those ideal meals that is flavorful and satisfying, yet you feel good after eating it. The hummus recipe is separate and can be found on Brittany's blog.

You could of course play around with any combination of veggies you'd like, but I think the peppers and feta are essential. Enjoy!

Healthy Veggie Stuffed Hummus Sandwich (serves 1).

2 slices- 100% Whole Wheat Nature’s Pride Bread

2 tbsp – basil hummus

1/4 cup- alfalfa sprouts

3 slices- red onion (thinly sliced)

3- roasted peppadew peppers (sliced/chopped)

4/5 leaves- baby spinach

4 slices- cucumber (thinly sliced)

1 tbsp – feta cheese

Sea salt and ground pepper to taste

Lay the two slices of bread out on a plate or other surface. Spread the equal amounts of hummus onto one side of both slices of bread. Layer the remaining ingredients on one slice of the bread in the order listed. Carefully top with the second slice of bread, cut the sandwich in half and enjoy! This recipe could easily be doubled, tripled or quadrupled depending on how many people you are serving.

New Poll: If you could only use one utensil...

Last spring I was asked a fun question by a date: "If you could only use one utensil the rest of your life, what would it be?" "Spoon", I responded. After all, you can pick up everything you'd eat with a fork with a spoon, plus those pesky liquids, and how often do you really need a knife? The follow-up dinner date I was encouraged to order a steak, and after the waitress walked away he gave me a lovely spoon (it even had a ribbon on it). Fortunately, the steak that night was stroganoff style, so I didn't make too much of a fool of myself.

It's a question I've thought a lot about since, including as I've attended the first ever Foodbuzz Blogger Festival, being held in San Francisco this weekend. We've been served from all sorts of dainty little dishes with miniature sporks and forks and simple finger items galore. There was one gift in our goodie bags though that I can't stop laughing about, and has given me an entirely new perspective on the proper answer. Before I share it, I wanted to take a quick poll (if you were at the festival also, shhh, don't spoil the surprise). Enter your vote above, or come up with your own suggestion in the comments section for this post. And more on the festival to come, or check out my Facebook page for a few photos.

Friday, August 28, 2009

Recipe: Chef Ryan Scott's Sweet Corn Soup

Tonight I continued my intern hours by assisting former Top Chef contestant Ryan Scott at a fundraiser event in San Francisco, Art for Aids. We served his amazing sweet corn soup with pickled cherry tomatoes as well as a hit of chili oil and tomato salt. Ryan's got a catering company here in SF now call Ryan Scott 2 Go.

We're in a heat wave... It struck with such sudden viciousness I actually got a call from a friend in sheer confusion. She couldn't understand why it was sweltering in her place, then walked outside and realized it was the entire city that was melting. Hot steaming soup at the peak of summer? In SF, it's usually a nice option since we're often still in coats anyways. That said, the soup received rave reviews despite the hot environs. Many people said it was the best dish in the house (other tables included SF notables Town Hall, Maya, Home and Asia de Cuba). My favorite feedback was someone who asked whether it was sweet or savory, and after being told it was savory told us "Well I like it even better than dessert."

Corn soup is one of those simple but completely pleasurable foods best served at the height of summer. Ryan's posting his recipes on his website, but because I can't seem to find it up yet check out the version I found here.

If you're interested in other summer corn recipes, I also found this old SF Chronicle article full of options, and a note on how to make "corn milk" (which is included in Ryan's recipe as well).

“Top Chef” Ryan Scott Sweet White Corn Soup Recipe
1/4 pound butter
1cup leeks, white part only, minced
2 cups onions, finely minced
2 Qt corn milk
1 Qt shucked corn
2 1/2 Qt's vegetable stock
1-cup heavy cream
Dash of Tabasco
3 T salt

Sweat in a large saucepan the butter, onions, and leeks or until translucent (5-10 min). Add the corn milk, corn, stock and simmer for 1/2 hour. Then add cream, salt, Tabasco, and bring to a boil. Puree in blender and strain through a fine mesh strainer (depending on the desired consistency of the soup)

“Top Chef” Ryan Scott Pickled Cherry Tomatoes Recipe
2 lbs Cherry tomatoes, cut in half and washed
2Tbs slivered garlic (as thin as a dime)
2 Tbs slivered ginger (as thin as a dime)
2 Tbs minced parsley
1 1/2 Tbs salt
1 Tbs Espelete pepper
1/2 Tbs tumeric
1 1/2 Tsp cracked black pepper
1 cup champagne vinegar or apple cider vinegar
1 1/4 cup corn oil
1 cup sugar

Boil salt, sugar, and vinegar till dissolved.

Heat the oil just warm enough to lightly cook the garlic, ginger, and spices. Cook till garlic is tender not brown.

Add vinegar slowly to the oil mixture and then add parsley. Pour liquid mixture over the halved tomatoes, let cool at room temperature, and then refrigerate. This mixture will hold up for weeks as long as its chilled. When serving it does taste better at room temperature.

Friday, August 21, 2009

Eat Here, Now


If you are in the Bay Area and have an excuse to have a nice dinner (or like me need no excuse), I have been raving about Commis to anyone and everyone. It's only been open 6 weeks or so, over in Oakland. I've been twice already I loved it so much, and if you're into cooking it's especially cool to sit at the counter and watch the chefs in the open kitchen. I posted my review on Chowhound, and was ammused to see it quoted under EaterSF's recap of online chatter about the restaurant with the heading "The Final World... For Now." If only I always got the final word.

Thursday, August 6, 2009

Recipe: Flourless Almond Torte with Melted Chocolate and Berry Sauce

This European torte uses ground almonds (almond flour) in place of "normal" flour. It's a good option for anyone eating gluten-free. It's also delicious and easy. I was so enthralled that I decided the torte deserved its own photo album. I bet other nuts would work well also in this recipe, especially hazelnuts.

Ingredients
Cake
1 ½ cups almonds
¼ cup maple syrup
3 large eggs
1 tsp almond extract
¼ tsp vanilla extract
¼ tsp sea salt
Toppings
2 oz bittersweet chocolate, melted, for topping
½ pint fresh raspberries
agave nectar, to taste
lemon juice, to taste
2 Tbs almonds, toasted and chopped

Procedure
1 Preheat the oven to 375 degrees. Line an 8 inch cake pan (a fluted tart pan or pie tin would work) with a parchment paper circle cut to fit the bottom.
2 In a food processor fitted with a metal blade, grind the almonds until they have a flour like consistency, about 1 - 2 minutes. If you go too long, it will get sticky and eventually turn to almond butter... not what you want. Run a spatula around the sides of the work bowl if it isn't mixing evenly.
3 Measure the maple syrup, eggs, extracts, and salt into a measuring cup, mixing well to break up the eggs. With the food processor running, pour the maple syrup mixture through the feed tube and process until smooth.
4 Pour the batter into the prepared pan and bake for 25 minutes. The torte is ready when the top is lightly golden brown and the center is just set, it may appear to even be a bit jiggly. Touch it to make sure it isn't too dry. Tent with foil if the top browns too quickly.
5 While the torte is baking, puree the raspberries with a touch of agave and a splash of lemon juice. Strain out seeds and set aside.
6 When torte is finished allow it to cool slightly before gently inverting the torte over a plate to remove from the pan. Carefully peel off the parchment paper. Turn it back over and place it on serving platter. Spread the melted dark chocolate over followed by the toasted almonds. Serve with the raspberry sauce.

Author: Adapted from "One Bite at a Time" by Rebecca Katz

Thursday, July 30, 2009

Winding Down

We're in the final countdown now. As of this Monday there was exactly one month left of school. Going into Bauman I had no idea what to expect. Would this be a "real" culinary program? It certainly isn't as well known as the CCA, Cordon Bleu, or myriad other professional cooking schools out there. I did what research I could, including an open house, web search, and careful read of all the school's materials. But honestly I had no idea what was to come the day I walked in that door.

Now, with five months of hindsight, would I do it again? ABSOLUTELY. No doubt whatsoever. Why? While I haven't received a traditional culinary experience (we had only one day of working with "meat," in our case only poultry), I have learned a ton. This has been a real education in how to make the type of food people should be eating; food that's not only delicious, but also healthy. Beyond the culinary skills, I feel extremely lucky to have a wonderful cast of characters as my costudents -- everyone from a former chef at Esalen, to my cauliflower-loving high-tech working carpooler, to a former physical therapist. Plus, as I've asked around in the food industry I've heard only good things about Bauman.

While I'm counting down the last days of class with a sense of sadness (there won't be a next year to look forward to like in grade school), the fact that the end is in sight is also somewhat of a relief. Just as I discovered this is a "real" program, I also realized the demands weren't trivial. Quite a few of my classmates are not working. My long work + class days have been exhausting at times. But I don't have it nearly as bad as some of my working classmates who are also commuting an hour+ each way to school.

What has been my biggest surprise in school? Probably that I like baking! I always considered myself more into cooking than baking, but I've found myself volunteering for more and more baking recipes, and realized that many of my blog postings have been baking related as well. This week, when I made the class' dessert (an almond torte with chocolate and raspberry sauce) I mentioned to everyone that I've never been into baking. They all said they'd gotten the impression it was my thing.

When this is done what's next? Spain! I have my flight booked. It's a trip planned around a dinner (thanks to my friend's El Bulli reservation... a meal at the world's #1 restaurant, what could be more appropriate for culinary school graduation?). I'm also hoping to take a cooking class in Barcelona, and do a food tour through the city. When I get back, I'll have about 40 internship hours to complete before I receive official certification as a Natural Chef, but I have six months to do those.

These last few weeks have been busier than usual, with a final project to prepare and showcase meal to plan. My final project subject is cooking for individuals with lactose intolerance, and I'll have the "awful" homework tomorrow night of testing a goat cheese cheesecake recipe I plan on preparing for the class (goat milk dairy is often easier to digest for those who have difficulty with cows milk). Because of the packed schedule, I've had less time to update photos and add recipes recently. But I plan on posting new favorite recipes soon, including the almond torte and a really flavorful fresh green bean and corn saute with chile powder and lime.

Tuesday, July 21, 2009

Weight Management Class Recipe: Roasted Salmon with Minted Plum Salsa

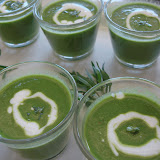
I'm having trouble figuring out which recipes to post from Weight Management class. They were all good! My teammate Jit and I made lettuce soup... Sounds weird, right? It was in fact delicious, simple (and of course healthy). Cooked lettuce is something that fascinates me. And the soup had tarragon too, which is one of my favorite herbs and completely underappreciated. There were also lemon almond cookies, chickpea basmati burgers with tomato chutney, cauliflower "couscous" and a zucchini carpaccio salad I'll get around to posting too.

But in the end there was one recipe that really blew me away:

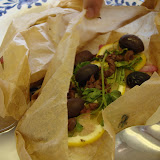
Roasted Salmon with Minted Plum Salsa

SALMON INGREDIENTS
1 ¾ lbs salmon fillets, skinned, portioned
½ cup lemon juice
¼ cup tamari
6 cloves garlic, thinly sliced
black pepper

SALSA INGREDIENTS
2 Tbs honey
⅓ cup apple cider vinegar
1 medium jalapeno, minced
4 large plums, whole, 1/4" dice
½ medium red onion, finely chopped
½ cup yellow tomato, 1/4" dice
½ Tbs grated ginger
2 Tbs minced mint
2 Tbs lime juice
2 Tbs olive oil

Procedure
1 Preheat oven to 425 degrees.
2 In an oven proof dish, marinate fillets for about 30 minutes in lemon juice and tamari, turning once midway.
3 Before roasting press garlic slices on top of each fillet then grind some black pepper over. Roast in the marinade for about 7 - 10 minutes, depending on thickness. Baste with the marinade occasionally. When done, flesh will look opaque and feel firm yet the middle should still be slightly reddish. The fish will continue to cook
after removing it from the oven.
4 PLUM SALSA: Combine honey and vinegar in a small saucepan and cook over moderate heat until reduced and it coats the back of a spoon. Remove from heat and let cool.
5 Combine remaining salsa ingredients together in a medium bowl and stir in the cooled reduction. Season with salt and pepper. Spoon over salmon fillets.
From Weight Management

Saturday, July 11, 2009

Making Seasoned Salts

Seasoned sea salts are a simple pantry item that can absolutely transform a dish. I use mine on roasted meats and veggies, sprinkled on scrambled eggs, and to rim glasses -- really you can use them on most things (farmers markets often showcase them on fresh heirloom tomatoes). They sell for around $15 at my local grocery store, but are extremely cheap to make yourself. And we learned in class that they are also very easy to make. So before you consider shelling out money for a fancy little packet, check out how to make a big batch at home. They also make beautiful party favors, holiday gifts, etc.

In my research I came across a posting from Mark Bittman of the NY Times on making sea salts that provides additional ideas you may want to check out. I notice he doesn't oven dry his, but I expect doing so preserves the herbs and other additions so that your salt keeps better.

Seasoned Sea Salt

Ingredients:
1 cup good quality sea salt (make sure you use sea salt and not simple table salt. sea salt has minerals and better flavor. plus table salt can actually leech minerals from your body)
At least 1/4 cup fresh herbs, washed and thoroughly dried, then rough chopped (Any mix you'd like. Rosemary, parsley, thyme, oregano, lavender, etc...)
Other additions (a garlic clove or two and citrus zest work well)

Procedure:
1. Preheat oven to 100F.
2. In a food processor, add all ingredients and process until well combined (herbs should be small specks of color). It is essential that herbs are completely dry before doing this. You can wash them approx. a day ahead, spin dry or pat with towel, and then leave out to dry completely until use.
3. Spread salt on a baking sheet in a thin layer (use multiple baking sheets depending on amount). Place in oven and bake approx. 45 minutes. (If you have a food dehydrator, you can use that instead of the oven).
4. Cool before packaging. Clumps may form. If you want to ensure even texture you can run the salt in the food processor again once oven-dried.

Note: We made rosemary and garlic salt with lemon zest. For our batch, we halved the recipe, used one clove of garlic and the zest of one lemon (to give a sense of proportion).

Recipe: Roasted Garlic and Herb Mashed Root Veggies

There's nothing more comforting than mashed potatoes. I'm always on the lookout for alternative versions since I can't have a lot of dairy and most use milk or cream. Plus, in class recently we discussed other health conditions that limit consuming potatoes due to their high-glycemic content (which spikes blood sugar and is bad for anyone who needs to limit their sugar intake like diabetics or those with candida).

Even if you don't have specific reasons to avoid potatoes, this "alternative mash" is soooooooo good. From the roasting, the veggies develope a sweet overtone that is rounded out by the savory roasted garlic and fresh herbs. You can use it as a versatile frame, swapping in any type of root vegetables you'd like, or use different herbs (we didn't have thyme and used rosemary instead).

Garlic and Herb Root Mash


Ingredients
1 large bulb garlic
2 medium turnips, peeled cut into 1 inch cubes
2 medium rutabagas, peeled and cut into 1 inch cubes
2 heads cauliflower, chopped into medium florets
1 tsp fresh oregano
1 tsp fresh thyme
to taste salt and pepper
2 Tbs ghee, if desired

Procedure
1 Preheat oven to 400 degrees. Cut the top off of the garlic bulb and drizzle with a little grapeseed oil. Wrap the garlic bulb in parchment paper and then foil and roast for 30- 40 min.
2 Place the turnips, rutabagas, and cauliflower in a large steamer pot and steam until very soft when pierced with a fork, about 15-20 minutes. It's fine if the cauliflower is softer than the other vegetables.
3 Once tender, transfer the vegetables to a large bowl and add the roasted garlic. Mash well with a potato masher. Alternatively, puree in a blender for a smoother consistency. Add the oregano, thyme, salt, and pepper and mix well. If desired, add the ghee for a creamier taste and texture.

Author: By Katherine Wilson, Natural Chef Instructor

Thursday, July 9, 2009

Three Twins Ice Cream Flavor Winner


And the winner is Ginger with Carmelized Pears and Roasted Macademia Nuts!!

Thanks to everyone who voted. I was secretly rooting for Strawberry Rhubarb Pie, which took an early lead but then the ginger flavor pulled ahead. This one sounds really good too though, and it's about to be pear season so perfect timing.

The Madison Farmers Market and Cheese Curds

My San Francisco neighborhood, the Inner Sunset, got a brand new farmers market last month. It's a wonderful community addition among a region full of different market options. But no market in California compares to the one I went to every summer weekend growing up... the Dane County Market, on the Capital square in Madison, Wisconsin.

I wanted to share some photos taken on my recent trip back which will give a sense of what it's like at the country's largest market. With over 300 vendors total and 150 on any given Saturday, there's an impressive array of people and goods, along with many "only in Wisconsin" elements. First of all, of course there's lots of cheese. Cheese curds, goat cheese, organic cheese, cheese spreads, frying cheese, and multiple bakery stalls competing to corner the spicy cheese bread market. And there is state pride. I'd estimate at least 1 of every 5 patrons are wearing Wisconsin shirts. Plus there's cheese shaped like the state and cookies shaped like cows (marked by signs noting that they will put you in "Udder Bliss").

From Cheese Curds & the Madison, WI Farmers Market

This year, I was impressed to see more organic farms, and a growing diversity of vendors. One stand sold only gourds -- miniature, gigantic, and everything in between. The woman there turned out to be a San Franciscan who had moved to Wisconsin five years ago. And my favorite discovery was a booth selling Emu eggs, which were a unique shade between deep purple and brown, and about 10 times the size of a chicken egg.

Every time I go back to the Madison farmers market I get cheese curds. If you haven't had them, they're bite size pieces of cheese that, when made fresh, actually squeak between your teeth. Hardcore Wisconsinites sometimes fry them, but eating them as is provides enough of a thrill (and enough calories) for me. I grabbed a bag of curds and hand-carried them home to California to serve at my belated b-day gathering. They were a highlight of the night. Our waiter was even kind enough to serve them up on a silver platter!

Wednesday, July 8, 2009

Chicago Salmon

Last week I went to my hometown of Madison, Wisconsin. While there, I dined in a favorite restaurant. One that you'd expect to represent the highest-caliber dining experience in town. I do love the people there and have gone for years, so I won't name names. But I couldn't resist sharing this real exchange with the waiter from while we were ordering:

Waiter: “Does anyone have any questions?”

Me: “Yes, is the salmon in the special wild or farm-raised?”

Waiter: “Hmmm… let me check on that.”

(He goes to the kitchen and returns a few minutes later)

Waiter: “I’m not really sure, but it comes from Chicago if that helps.”

Poor waiter. I burst out laughing and actually felt quite bad about it afterwards. But when was the last time you saw salmon swimming through streams in the Windy City?

Monday, June 29, 2009

Create an Ice Cream Flavor Part 2: Time to vote!

It was about 95 degrees this weekend at the farmers market. The produce stands were deserted and the free range eggs were practically frying themselves, but the knight in shining armor behind the ice cream had a line of sweat-drenched, frozen-treat-craving maidens vying for attention. It made me remember our ice cream flavor brainstorm. The Three Twins Organic Ice Cream owner’s ears must have been itching, because he sent on a list of his favorite flavor ideas shortly after:

Almond, coconut, chocolate
Peach crumble
Rum raisin
Ginger with caramelized pears and roasted macadamias
Strawberry rhubarb pie

So the poll is now up at the top of my blog! Vote for your favorite flavor for development by Three Twins. Only one vote per person (choose wisely). The poll closes July 6th at 6:00pm, and the winner will be announced shortly after.

Transit Time

Everyone who's coming to look at the yummy ice cream flavors, spoiler alert: don't read this posting. It's not appetizing, and it's not about how long it's going to take you to drive to get ice cream. What we are learning is both the nutritional aspects of what we eat, and how to make it. So of course our course wouldn't be complete without a lecture on "Digestive Wellness." Sure enough, that rolled around this week. It even merited two full class days (Thai cooking, seafood and sauces on the other hand, all were only one... this is one culinary school where how appetizing a subject is clearly doesn't pull rank).

With cleanses all the rage, one of the things we talked about was "transit time" -- i.e. how long from in to out. To break it down, what you consume should take about 1 minute in your mouth, 2 - 3 seconds in your esophagus, 2 - 4 hours in your stomach, 1 - 4 hours in your small intestines and 10 hours - 3 days in your large intestines. Of course, certain things take longer than others (and I found this fascinating). How long what you ingest stays "in residence" in your stomach falls into approximately the following rank order:

- Liquids: within a few minutes
- Fruits: 1 - 2 hours
- Veggies: a little longer
- Starches and grain: longer
- Legumes: longer still
- Protein: 3+ hours
- Fat: Longest

In total, transit time should be between 18 and 24 hours ideally. How can you test this? Eat 2 tablespoons of sesame seeds and keep a watch out for when they show back up. See, I warned you it wouldn't be appetizing. I'm going to leave it to other sources to tell you what to do if it takes the little buggers too long to show up... plenty of info out there and I'm not looking to become a specialist.

Friday, June 26, 2009

Recipe: Classic Tomato Gazpacho with Croutons


Tomorrow I have to do a 15 minute "class presentation" of a recipe that demonstrates medium dicing, toasting and using a mortar and pestle. Since tomatoes have just come into season, I thought a gazpacho topped with croutons would be perfect -- I can use the mortar and pestle to make a garlic paste, and demonstrate the knife skill and toasting with the croutons. The only trick was to create a version that could come together (and taste good) in only 15 minutes. Here's what I developed (you're getting a sneak peek of my class handout).

Classic Gazpacho with Croutons

Gazpacho is typically better the next day, after the flavors meld. For this quick and easy version that tastes good right away, I used bottled tomato juice, plenty of vinegar and a garlic paste to provide an instant flavor base. You can make this gluten-free by substituting gluten-free bread.

Ingredients

Soup:
2 cups peeled and diced (1/4 inch) hothouse cucumber, seeded
2 cups diced (1/4 inch) bell pepper (red, yellow or orange)
2 cups diced (1/4 inch) ripe tomato
1/2 cup diced (1/4 inch) red onion (soaked in water and a bit of vinegar for at least 20 minutes - this makes raw onion much more palatable by removing the strong aftertaste)
2 cups high-quality tomato juice (Knudsen recommended)
1/2 cup red-wine vinegar
1/3 cup extra-virgin olive oil
1/4 cup cilantro, chopped
1 clove garlic
Sea salt and pepper, to taste

Croutons:
3 slices bread, medium diced
4 tablespoons olive oil
Salt to taste

Optional: Seasoned sea salt to rim glass

Directions

1) Preheat oven to 400 degrees. Toss bread with olive oil and salt, spread on baking sheet lined with parchment paper, and place in center of oven. Toast approx. 10 minutes (or until golden brown), turning once. Remove and allow to cool.
2) While croutons toast, place the diced vegetables in a large bowl. Add the tomato juice, vinegar (reserve a few tablespoons), oil and cilantro (reserve a bit for garnish).
3) In a mortar and pestle, mash garlic with salt and 3 croutons. Add to soup mixture.
4) Transfer half of the mixture to a blender and pulse to coarsely puree. Return to the bowl, and stir to combine. Season with salt and pepper and remaining vinegar if needed (it should taste almost spicy from the vinegar, but not be overly acidic).
5) For serving, rim glasses in seasoned salt if desired. Garnish with croutons and cilantro.

Servings: 4 - 6 bowls. Adapted from “Farmstand Gazpacho,” Parade Magazine, June 2008.

Nutritional Information:

Tomatoes – Contain lycopene (a red carotene) that prevents diseases (including cancer and heart disease) by neutralizing harmful oxygen free radicals before they can do damage to cellular structures.

Cucumber – An excellent source of silica, a trace mineral that contributes to connective tissue strength.

Bell peppers – Protective against cataracts (possibly due to vitamin C and beta-carotene). Capsaicin, flavonoids and vitamin C also shown to prevent blood clots and reduce risk of heart attacks and strokes (similar to chili peppers, though not as concentrated).