Tuesday, December 29, 2009

Recipe: African Chicken Stew

I’ve been craving African Peanut Stew since seeing this recipe a few months back. It’s something I’ve made a couple times, including one version in school. But seeing this one inspired me to improvise a new recipe that was better and healthier than any I've had before. Traditionally made with lots of peanut butter, this stew can be rich. My version reduces the amount of peanut butter, amps up the spices, and tosses in lots of flavorful veggies and roasted chicken. To accompany, I served quinoa with shredded coconut, scallions and cinnamon. This is a flexible recipe... toss in whatever vegetables you have on hand, make it veggie only by substituting beans for the meat (I bet garbanzos would be good), play with the seasonings, or switch up the additions to your grain.

Ingredients
Stew-
2 tbsp peanut oil (coconut oil would also be great, or you can use EVOO)
1 onion, sliced in half and then strips
3 cloves garlic, peeled and minced
Ginger, 1 inch piece peeled and minced
½ tsp cumin
¼ tsp cinnamon
¼ tsp ground ginger
½ tsp coriander seeds, toasted and then ground
½ tsp garam masala
Cayenne pepper, to taste (optional)
Jalapeno pepper, chopped (optional)
1 tbsp tomato paste
4 cups chicken or veggie stock
1 sweet potato or yam, cut into ½ inch cubes
½ cup mushrooms, quartered
1 cup canned diced tomatoes (I used Trader Joes with jalapenos)
¼ cup peanut butter (smooth or chunky both work)
Approx. 2 cups roast chicken, cut into small bites
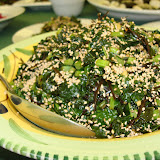
Kale or chard, 1 bunch thinly-sliced (stems removed, these can be added in earlier if you want to use them since they take longer to cook)
Salt, to taste

Topping-
1 small bell pepper (any color you’d like), chopped
Scallions and/or cilantro, sliced

Quinoa- (Bring all to a boil, turn off heat, cover and let sit 15 minutes. Fluff with a fork when done. If liquid remains put on low heat uncovered, stir occasionally and watch carefully so it doesn’t burn)
¾ cup quinoa, well rinsed
1 ½ cup water or broth
Small handful shredded coconut
1 scallion, sliced
Sprinkle of cinnamon
Pinch of salt

Directions
Heat oil over medium in a large pot or dutch oven. Add onion and saute until tender (but not caramelized), add garlic and ginger and cook for a minute. Add spices, tomato paste and jalapeno (if using). Cook one more minute, stirring to combine well.

Add in chicken stock, diced tomatoes and all vegetables except the greens (kale or chard). Cover and simmer for approx. 20 minutes, or until potato is almost tender. Stir in peanut butter, chicken and greens. Cover and simmer another approx. 10 minutes, until greens are cooked. Add salt and adjust seasonings to taste.

Serve over quinoa or other grain topped with the bell pepper and herbs.

6 servings

Sunday, November 22, 2009

Recipe: Palak Paneer Omelet (my breakfast with Madi)

I'm dogsitting. Living the single city lifestyle, I don't usually make it up for breakfast on the weekend, but this week I have my canine companion (Madi there on the left) nudging me at 7am each day. Thus, I saw this drizzly Sunday AM in nice and early and had lots of time to make breakfast. Of course, Madi's kibble entree took priority. But after that, I thought about feeding myself. When I looked in the fridge, a container of palak paneer, Indian spiced spinach and cheese, jumped out at me. Since spinach and cheese are two of my favorite things in omelets, I got creative and used my leftovers as a filling. The result blew me away. Tons of flavor, a nice change to the normal breakfast offerings, and healthy!

You can buy your palak paneer at the grocery store. Tasty Bites makes a good version or get it at a restaurant. Or if you've got the time and ambition, It is actually quite easy to make yourself. It's even simple to make the paneer, and you'll get a huge feeling accomplishment (it's not every day you get to say you made cheese right?!)

Palak Paneer Omelet

Ingredients
2 eggs (preferably free range)
3 tbsp palak paneer
Approx. 4 tbsp frozen chopped spinach (or fresh if you have it)
1 scallion, sliced thin
Small handful cilantro, chopped
Garam masala
Ground ginger
Garlic powder (or 1 fresh clove, minced)
Sea salt
1 tsp brewers yeast (optional)

Procedure

Cook spinach in an omelet-size nonstick skillet over medium heat. Meanwhile, in a small bowl, crack eggs and beat, adding a slight bit of water to ensure your omelet isn't dry at the end. Season egg mixture with sea salt, and dashes of garlic powder and garam masala. Add eggs to skillet and combine with the spinach. Allow omelet to set. Once set, add palak paneer to center and sprinkle with just a touch of ground ginger, as well as half the sliced scallions. Finish cooking omelet and plate. Top with brewers yeast if using, cilantro and remaining scallion. Great served with pita or naan bread.

Thursday, November 19, 2009

Part I: Food Blogger Festival Favorite Things

I was lucky enough to attend the Foodbuzz Food Bloggers Festival a few weeks back here in SF, and have been meaning to do a wrap-up. As I was jotting down thoughts, I realized there's no way I can cover all in one posting so here's Part I of what will be two posts on my favorite things from a phenomenal event. This post covers Alternative Dining Experiences and Healthy Eats. Part II will include Holiday Foodie Gift Sources, Best Wines and Sandwiches (random I know, but I had two of the best of my life there), as well as unveil the utensil from my goodie bag that prompted me to run my "if you could only use one utensil the rest of your life" poll. Here goes Part I...

Top "Alternative Dining" Experiences:
The Outstanding In The Field (OITF) dinner, set in Greenleaf Produce's South SF warehouse and cooked by SF's Namu restaurant. OITF is something I've wanted to do for years thanks to my foodie buddy Michael Thacker. It's a big dinner that feels part flash mob, part wedding feast, part art show, and is mostly just incredibly delicious as the guest chefs use all seasonal, local produce, usually from the farm the meal is held at (to get a better sense check out their photo gallery). In our case, it also felt part rave being in an industrial district, but hey when you have hundreds of people at a city conference a produce warehouse is a damn fine substitute for a farm field! Especially when the food (for pics see my friend Steph's photos here... more on her in a bit) is as good as what Namu turned out -- so good that I went to their actual restaurant this week. It's a neighborhood gem. I saw the same crew working away, they had fun music going, a buzzing crowd and of course the food was delicious again. They also have special nights -- Monday free bar food from 9:30 - 10:30pm, Tuesday free cab ride on them, and Wednesday there was something too which I'm blanking on (sorry!).

ForageSF -- So we didn't actually have a ForageSF dinner, but I did have the pleasure of meeting founder Iso Rabins, which I enjoyed because I'd been to one of his dinners at Radio Africa Kitchen. His dinners (and Radio Africa Kitchen) are both additional fabulous alternative dining experiences. Iso forages for wild ingredients like seaweed, mushrooms and shellfish. Then a guest chef turns out a feast using the wild food. If you're local I'd strongly recommend you sign up to keep in the loop, I just did!

Healthy Eats:
Steph Chows -- Steph and I enjoyed hanging out throughout the Festival. She's got the most vivacious personality yet in a very down-to-earth way that I kinda miss from growing up in Wisconsin... she's good to the core, and she likes to eat healthy like I do! But we have a very similar perspective -- eat healthy most of the time and workout, but enjoy your food and splurge sometimes too (see her peanut butter and chocolate bread pudding muffins for a splurge-worthy recipe). We were both huge fans of the lavender raw cheesecake we tried from Alive (more on them next) and I knew I adored her when she went back for seconds of the Strauss ice cream and we discussed our mutual adoration for the coffee flavor. I must admit to being intimidated by her blog it's so well-written and got such character. I aspire to be like her someday... make sure you check it out. She even put a nice photo of us about halfway through her wrap-up, and the photo here of us was hers too!


Alive Restaurant -- I thought I'd tried all the raw/vegan/healthy restaurant options in SF. Turns out I was missing one very impressive option. Alive served a couple savory options and a sweet treat at the Friday dinner, and their food was outstanding! I can't wait to get to the restaurant to try it out. The raw cracker with avocado on top and raw cheesecake were favorites of mine. Even though there was tons of bad-for-me food around like pizza and cup cakes, I would have happily filled up on those.

Friday, November 13, 2009

Recipe: Herb-roasted Butternut Squash with Chicken Apple Sausage

With holiday parties and potlucks starting, I wanted to share a recipe I made for my Stanford Womens Alumni Club neighborhood potluck dinner this week. This group is the most vibrant, lovely gathering of women alum of all ages. I love the intergenerational exchange of stories, heated discussions on current happenings, and delicious sharing of favorite recipes!

When the invite came I thought of winter squash and apples since both are in season. In the past, I’ve roasted butternut squash halves with an Italian sausage and apple filling, so was considering something similar. A recipe search, however, turned up the following dish which takes the squash and roasts it cubed, along with plenty of herbs and pieces of pre-cooked sausage. It’s a tasty recipe as is, but I wanted to add my own character. I used truffle oil, lots of the fresh herbs and additional dry herbs as well, tossed in apples along with some shallots (I adore them roasted and thought it would be a bigger crowd pleasure than garlic), used the chicken apple sausage as suggested, and gave the whole thing a big sprinkling of black truffle salt.

This recipe is versatile, healthy, and can be made ahead so it’s a good one for all the upcoming festivities! Any mix of things could be tossed in really. It would be great also with red peppers, broccoli, other squashes or sweet potatoes, etc… I doubled the quantity for our group of 10, and the roasting time increased to about 45 minutes so beware you may have to adjust your cooking time. Enjoy!

Herb-Roasted Sausages and Butternut Squash

Adapted from Bon Appétit, December 2003

Yield: Makes 4 servings

Ingredients
6 cups 3/4-inch cubes peeled butternut squash (about 1 1/2 pounds)
1 pound purchased fully cooked sausages (such as chicken and apple), cut into 1 1/2-inch pieces
8 garlic cloves (or 6 shallots, peeled)
3 tablespoons flavored olive oil (such as roasted pepper or herb, I used truffle oil) or regular olive oil
1 tablespoon chopped fresh rosemary
1 tablespoon chopped fresh sage
1 tablespoon chopped fresh thyme
Salt and pepper, to taste
1 1/2 tablespoons balsamic vinegar

Preparation

Preheat oven to 450°F. Combine squash and next 6 ingredients in large roasting pan. Toss to coat. Sprinkle with salt and pepper. Roast until squash is tender and sausage is warmed through, stirring once, about 30 minutes.

Transfer squash and sausages to platter. Drizzle with vinegar and serve.

Saturday, November 7, 2009

Recipe: Best Veggie Sandwich Ever


One of the bloggers I met at this weekend's Foodbuzz Blogger Festival was Brittany from Eating Bird Food. She won a recipe challenge from Nature's Pride bread for this sandwich. At first glance it doesn't sound unusual. Hummus and veggies, we've all had that, right? But the hummus is white bean and basil, plus the sandwich gets amazing flavor from feta and peppadew peppers. Brittany told me she got these peppers, which are miniature and red, from the olive bar at Whole Foods. This is one of those ideal meals that is flavorful and satisfying, yet you feel good after eating it. The hummus recipe is separate and can be found on Brittany's blog.

You could of course play around with any combination of veggies you'd like, but I think the peppers and feta are essential. Enjoy!

Healthy Veggie Stuffed Hummus Sandwich (serves 1).

2 slices- 100% Whole Wheat Nature’s Pride Bread

2 tbsp – basil hummus

1/4 cup- alfalfa sprouts

3 slices- red onion (thinly sliced)

3- roasted peppadew peppers (sliced/chopped)

4/5 leaves- baby spinach

4 slices- cucumber (thinly sliced)

1 tbsp – feta cheese

Sea salt and ground pepper to taste

Lay the two slices of bread out on a plate or other surface. Spread the equal amounts of hummus onto one side of both slices of bread. Layer the remaining ingredients on one slice of the bread in the order listed. Carefully top with the second slice of bread, cut the sandwich in half and enjoy! This recipe could easily be doubled, tripled or quadrupled depending on how many people you are serving.

New Poll: If you could only use one utensil...

Last spring I was asked a fun question by a date: "If you could only use one utensil the rest of your life, what would it be?" "Spoon", I responded. After all, you can pick up everything you'd eat with a fork with a spoon, plus those pesky liquids, and how often do you really need a knife? The follow-up dinner date I was encouraged to order a steak, and after the waitress walked away he gave me a lovely spoon (it even had a ribbon on it). Fortunately, the steak that night was stroganoff style, so I didn't make too much of a fool of myself.

It's a question I've thought a lot about since, including as I've attended the first ever Foodbuzz Blogger Festival, being held in San Francisco this weekend. We've been served from all sorts of dainty little dishes with miniature sporks and forks and simple finger items galore. There was one gift in our goodie bags though that I can't stop laughing about, and has given me an entirely new perspective on the proper answer. Before I share it, I wanted to take a quick poll (if you were at the festival also, shhh, don't spoil the surprise). Enter your vote above, or come up with your own suggestion in the comments section for this post. And more on the festival to come, or check out my Facebook page for a few photos.

Friday, August 28, 2009

Recipe: Chef Ryan Scott's Sweet Corn Soup

Tonight I continued my intern hours by assisting former Top Chef contestant Ryan Scott at a fundraiser event in San Francisco, Art for Aids. We served his amazing sweet corn soup with pickled cherry tomatoes as well as a hit of chili oil and tomato salt. Ryan's got a catering company here in SF now call Ryan Scott 2 Go.

We're in a heat wave... It struck with such sudden viciousness I actually got a call from a friend in sheer confusion. She couldn't understand why it was sweltering in her place, then walked outside and realized it was the entire city that was melting. Hot steaming soup at the peak of summer? In SF, it's usually a nice option since we're often still in coats anyways. That said, the soup received rave reviews despite the hot environs. Many people said it was the best dish in the house (other tables included SF notables Town Hall, Maya, Home and Asia de Cuba). My favorite feedback was someone who asked whether it was sweet or savory, and after being told it was savory told us "Well I like it even better than dessert."

Corn soup is one of those simple but completely pleasurable foods best served at the height of summer. Ryan's posting his recipes on his website, but because I can't seem to find it up yet check out the version I found here.

If you're interested in other summer corn recipes, I also found this old SF Chronicle article full of options, and a note on how to make "corn milk" (which is included in Ryan's recipe as well).

“Top Chef” Ryan Scott Sweet White Corn Soup Recipe
1/4 pound butter
1cup leeks, white part only, minced
2 cups onions, finely minced
2 Qt corn milk
1 Qt shucked corn
2 1/2 Qt's vegetable stock
1-cup heavy cream
Dash of Tabasco
3 T salt

Sweat in a large saucepan the butter, onions, and leeks or until translucent (5-10 min). Add the corn milk, corn, stock and simmer for 1/2 hour. Then add cream, salt, Tabasco, and bring to a boil. Puree in blender and strain through a fine mesh strainer (depending on the desired consistency of the soup)

“Top Chef” Ryan Scott Pickled Cherry Tomatoes Recipe
2 lbs Cherry tomatoes, cut in half and washed
2Tbs slivered garlic (as thin as a dime)
2 Tbs slivered ginger (as thin as a dime)
2 Tbs minced parsley
1 1/2 Tbs salt
1 Tbs Espelete pepper
1/2 Tbs tumeric
1 1/2 Tsp cracked black pepper
1 cup champagne vinegar or apple cider vinegar
1 1/4 cup corn oil
1 cup sugar

Boil salt, sugar, and vinegar till dissolved.

Heat the oil just warm enough to lightly cook the garlic, ginger, and spices. Cook till garlic is tender not brown.

Add vinegar slowly to the oil mixture and then add parsley. Pour liquid mixture over the halved tomatoes, let cool at room temperature, and then refrigerate. This mixture will hold up for weeks as long as its chilled. When serving it does taste better at room temperature.

Friday, August 21, 2009

Eat Here, Now


If you are in the Bay Area and have an excuse to have a nice dinner (or like me need no excuse), I have been raving about Commis to anyone and everyone. It's only been open 6 weeks or so, over in Oakland. I've been twice already I loved it so much, and if you're into cooking it's especially cool to sit at the counter and watch the chefs in the open kitchen. I posted my review on Chowhound, and was ammused to see it quoted under EaterSF's recap of online chatter about the restaurant with the heading "The Final World... For Now." If only I always got the final word.

Thursday, August 6, 2009

Recipe: Flourless Almond Torte with Melted Chocolate and Berry Sauce

This European torte uses ground almonds (almond flour) in place of "normal" flour. It's a good option for anyone eating gluten-free. It's also delicious and easy. I was so enthralled that I decided the torte deserved its own photo album. I bet other nuts would work well also in this recipe, especially hazelnuts.

Ingredients
Cake
1 ½ cups almonds
¼ cup maple syrup
3 large eggs
1 tsp almond extract
¼ tsp vanilla extract
¼ tsp sea salt
Toppings
2 oz bittersweet chocolate, melted, for topping
½ pint fresh raspberries
agave nectar, to taste
lemon juice, to taste
2 Tbs almonds, toasted and chopped

Procedure
1 Preheat the oven to 375 degrees. Line an 8 inch cake pan (a fluted tart pan or pie tin would work) with a parchment paper circle cut to fit the bottom.
2 In a food processor fitted with a metal blade, grind the almonds until they have a flour like consistency, about 1 - 2 minutes. If you go too long, it will get sticky and eventually turn to almond butter... not what you want. Run a spatula around the sides of the work bowl if it isn't mixing evenly.
3 Measure the maple syrup, eggs, extracts, and salt into a measuring cup, mixing well to break up the eggs. With the food processor running, pour the maple syrup mixture through the feed tube and process until smooth.
4 Pour the batter into the prepared pan and bake for 25 minutes. The torte is ready when the top is lightly golden brown and the center is just set, it may appear to even be a bit jiggly. Touch it to make sure it isn't too dry. Tent with foil if the top browns too quickly.
5 While the torte is baking, puree the raspberries with a touch of agave and a splash of lemon juice. Strain out seeds and set aside.
6 When torte is finished allow it to cool slightly before gently inverting the torte over a plate to remove from the pan. Carefully peel off the parchment paper. Turn it back over and place it on serving platter. Spread the melted dark chocolate over followed by the toasted almonds. Serve with the raspberry sauce.

Author: Adapted from "One Bite at a Time" by Rebecca Katz

Thursday, July 30, 2009

Winding Down

We're in the final countdown now. As of this Monday there was exactly one month left of school. Going into Bauman I had no idea what to expect. Would this be a "real" culinary program? It certainly isn't as well known as the CCA, Cordon Bleu, or myriad other professional cooking schools out there. I did what research I could, including an open house, web search, and careful read of all the school's materials. But honestly I had no idea what was to come the day I walked in that door.

Now, with five months of hindsight, would I do it again? ABSOLUTELY. No doubt whatsoever. Why? While I haven't received a traditional culinary experience (we had only one day of working with "meat," in our case only poultry), I have learned a ton. This has been a real education in how to make the type of food people should be eating; food that's not only delicious, but also healthy. Beyond the culinary skills, I feel extremely lucky to have a wonderful cast of characters as my costudents -- everyone from a former chef at Esalen, to my cauliflower-loving high-tech working carpooler, to a former physical therapist. Plus, as I've asked around in the food industry I've heard only good things about Bauman.

While I'm counting down the last days of class with a sense of sadness (there won't be a next year to look forward to like in grade school), the fact that the end is in sight is also somewhat of a relief. Just as I discovered this is a "real" program, I also realized the demands weren't trivial. Quite a few of my classmates are not working. My long work + class days have been exhausting at times. But I don't have it nearly as bad as some of my working classmates who are also commuting an hour+ each way to school.

What has been my biggest surprise in school? Probably that I like baking! I always considered myself more into cooking than baking, but I've found myself volunteering for more and more baking recipes, and realized that many of my blog postings have been baking related as well. This week, when I made the class' dessert (an almond torte with chocolate and raspberry sauce) I mentioned to everyone that I've never been into baking. They all said they'd gotten the impression it was my thing.

When this is done what's next? Spain! I have my flight booked. It's a trip planned around a dinner (thanks to my friend's El Bulli reservation... a meal at the world's #1 restaurant, what could be more appropriate for culinary school graduation?). I'm also hoping to take a cooking class in Barcelona, and do a food tour through the city. When I get back, I'll have about 40 internship hours to complete before I receive official certification as a Natural Chef, but I have six months to do those.

These last few weeks have been busier than usual, with a final project to prepare and showcase meal to plan. My final project subject is cooking for individuals with lactose intolerance, and I'll have the "awful" homework tomorrow night of testing a goat cheese cheesecake recipe I plan on preparing for the class (goat milk dairy is often easier to digest for those who have difficulty with cows milk). Because of the packed schedule, I've had less time to update photos and add recipes recently. But I plan on posting new favorite recipes soon, including the almond torte and a really flavorful fresh green bean and corn saute with chile powder and lime.

Tuesday, July 21, 2009

Weight Management Class Recipe: Roasted Salmon with Minted Plum Salsa

I'm having trouble figuring out which recipes to post from Weight Management class. They were all good! My teammate Jit and I made lettuce soup... Sounds weird, right? It was in fact delicious, simple (and of course healthy). Cooked lettuce is something that fascinates me. And the soup had tarragon too, which is one of my favorite herbs and completely underappreciated. There were also lemon almond cookies, chickpea basmati burgers with tomato chutney, cauliflower "couscous" and a zucchini carpaccio salad I'll get around to posting too.

But in the end there was one recipe that really blew me away:

Roasted Salmon with Minted Plum Salsa

SALMON INGREDIENTS
1 ¾ lbs salmon fillets, skinned, portioned
½ cup lemon juice
¼ cup tamari
6 cloves garlic, thinly sliced
black pepper

SALSA INGREDIENTS
2 Tbs honey
⅓ cup apple cider vinegar
1 medium jalapeno, minced
4 large plums, whole, 1/4" dice
½ medium red onion, finely chopped
½ cup yellow tomato, 1/4" dice
½ Tbs grated ginger
2 Tbs minced mint
2 Tbs lime juice
2 Tbs olive oil

Procedure
1 Preheat oven to 425 degrees.
2 In an oven proof dish, marinate fillets for about 30 minutes in lemon juice and tamari, turning once midway.
3 Before roasting press garlic slices on top of each fillet then grind some black pepper over. Roast in the marinade for about 7 - 10 minutes, depending on thickness. Baste with the marinade occasionally. When done, flesh will look opaque and feel firm yet the middle should still be slightly reddish. The fish will continue to cook
after removing it from the oven.
4 PLUM SALSA: Combine honey and vinegar in a small saucepan and cook over moderate heat until reduced and it coats the back of a spoon. Remove from heat and let cool.
5 Combine remaining salsa ingredients together in a medium bowl and stir in the cooled reduction. Season with salt and pepper. Spoon over salmon fillets.
From Weight Management

Saturday, July 11, 2009

Making Seasoned Salts

Seasoned sea salts are a simple pantry item that can absolutely transform a dish. I use mine on roasted meats and veggies, sprinkled on scrambled eggs, and to rim glasses -- really you can use them on most things (farmers markets often showcase them on fresh heirloom tomatoes). They sell for around $15 at my local grocery store, but are extremely cheap to make yourself. And we learned in class that they are also very easy to make. So before you consider shelling out money for a fancy little packet, check out how to make a big batch at home. They also make beautiful party favors, holiday gifts, etc.

In my research I came across a posting from Mark Bittman of the NY Times on making sea salts that provides additional ideas you may want to check out. I notice he doesn't oven dry his, but I expect doing so preserves the herbs and other additions so that your salt keeps better.

Seasoned Sea Salt

Ingredients:
1 cup good quality sea salt (make sure you use sea salt and not simple table salt. sea salt has minerals and better flavor. plus table salt can actually leech minerals from your body)
At least 1/4 cup fresh herbs, washed and thoroughly dried, then rough chopped (Any mix you'd like. Rosemary, parsley, thyme, oregano, lavender, etc...)
Other additions (a garlic clove or two and citrus zest work well)

Procedure:
1. Preheat oven to 100F.
2. In a food processor, add all ingredients and process until well combined (herbs should be small specks of color). It is essential that herbs are completely dry before doing this. You can wash them approx. a day ahead, spin dry or pat with towel, and then leave out to dry completely until use.
3. Spread salt on a baking sheet in a thin layer (use multiple baking sheets depending on amount). Place in oven and bake approx. 45 minutes. (If you have a food dehydrator, you can use that instead of the oven).
4. Cool before packaging. Clumps may form. If you want to ensure even texture you can run the salt in the food processor again once oven-dried.

Note: We made rosemary and garlic salt with lemon zest. For our batch, we halved the recipe, used one clove of garlic and the zest of one lemon (to give a sense of proportion).

Recipe: Roasted Garlic and Herb Mashed Root Veggies

There's nothing more comforting than mashed potatoes. I'm always on the lookout for alternative versions since I can't have a lot of dairy and most use milk or cream. Plus, in class recently we discussed other health conditions that limit consuming potatoes due to their high-glycemic content (which spikes blood sugar and is bad for anyone who needs to limit their sugar intake like diabetics or those with candida).

Even if you don't have specific reasons to avoid potatoes, this "alternative mash" is soooooooo good. From the roasting, the veggies develope a sweet overtone that is rounded out by the savory roasted garlic and fresh herbs. You can use it as a versatile frame, swapping in any type of root vegetables you'd like, or use different herbs (we didn't have thyme and used rosemary instead).

Garlic and Herb Root Mash


Ingredients
1 large bulb garlic
2 medium turnips, peeled cut into 1 inch cubes
2 medium rutabagas, peeled and cut into 1 inch cubes
2 heads cauliflower, chopped into medium florets
1 tsp fresh oregano
1 tsp fresh thyme
to taste salt and pepper
2 Tbs ghee, if desired

Procedure
1 Preheat oven to 400 degrees. Cut the top off of the garlic bulb and drizzle with a little grapeseed oil. Wrap the garlic bulb in parchment paper and then foil and roast for 30- 40 min.
2 Place the turnips, rutabagas, and cauliflower in a large steamer pot and steam until very soft when pierced with a fork, about 15-20 minutes. It's fine if the cauliflower is softer than the other vegetables.
3 Once tender, transfer the vegetables to a large bowl and add the roasted garlic. Mash well with a potato masher. Alternatively, puree in a blender for a smoother consistency. Add the oregano, thyme, salt, and pepper and mix well. If desired, add the ghee for a creamier taste and texture.

Author: By Katherine Wilson, Natural Chef Instructor

Thursday, July 9, 2009

Three Twins Ice Cream Flavor Winner


And the winner is Ginger with Carmelized Pears and Roasted Macademia Nuts!!

Thanks to everyone who voted. I was secretly rooting for Strawberry Rhubarb Pie, which took an early lead but then the ginger flavor pulled ahead. This one sounds really good too though, and it's about to be pear season so perfect timing.

The Madison Farmers Market and Cheese Curds

My San Francisco neighborhood, the Inner Sunset, got a brand new farmers market last month. It's a wonderful community addition among a region full of different market options. But no market in California compares to the one I went to every summer weekend growing up... the Dane County Market, on the Capital square in Madison, Wisconsin.

I wanted to share some photos taken on my recent trip back which will give a sense of what it's like at the country's largest market. With over 300 vendors total and 150 on any given Saturday, there's an impressive array of people and goods, along with many "only in Wisconsin" elements. First of all, of course there's lots of cheese. Cheese curds, goat cheese, organic cheese, cheese spreads, frying cheese, and multiple bakery stalls competing to corner the spicy cheese bread market. And there is state pride. I'd estimate at least 1 of every 5 patrons are wearing Wisconsin shirts. Plus there's cheese shaped like the state and cookies shaped like cows (marked by signs noting that they will put you in "Udder Bliss").

From Cheese Curds & the Madison, WI Farmers Market

This year, I was impressed to see more organic farms, and a growing diversity of vendors. One stand sold only gourds -- miniature, gigantic, and everything in between. The woman there turned out to be a San Franciscan who had moved to Wisconsin five years ago. And my favorite discovery was a booth selling Emu eggs, which were a unique shade between deep purple and brown, and about 10 times the size of a chicken egg.

Every time I go back to the Madison farmers market I get cheese curds. If you haven't had them, they're bite size pieces of cheese that, when made fresh, actually squeak between your teeth. Hardcore Wisconsinites sometimes fry them, but eating them as is provides enough of a thrill (and enough calories) for me. I grabbed a bag of curds and hand-carried them home to California to serve at my belated b-day gathering. They were a highlight of the night. Our waiter was even kind enough to serve them up on a silver platter!

Wednesday, July 8, 2009

Chicago Salmon

Last week I went to my hometown of Madison, Wisconsin. While there, I dined in a favorite restaurant. One that you'd expect to represent the highest-caliber dining experience in town. I do love the people there and have gone for years, so I won't name names. But I couldn't resist sharing this real exchange with the waiter from while we were ordering:

Waiter: “Does anyone have any questions?”

Me: “Yes, is the salmon in the special wild or farm-raised?”

Waiter: “Hmmm… let me check on that.”

(He goes to the kitchen and returns a few minutes later)

Waiter: “I’m not really sure, but it comes from Chicago if that helps.”

Poor waiter. I burst out laughing and actually felt quite bad about it afterwards. But when was the last time you saw salmon swimming through streams in the Windy City?

Monday, June 29, 2009

Create an Ice Cream Flavor Part 2: Time to vote!

It was about 95 degrees this weekend at the farmers market. The produce stands were deserted and the free range eggs were practically frying themselves, but the knight in shining armor behind the ice cream had a line of sweat-drenched, frozen-treat-craving maidens vying for attention. It made me remember our ice cream flavor brainstorm. The Three Twins Organic Ice Cream owner’s ears must have been itching, because he sent on a list of his favorite flavor ideas shortly after:

Almond, coconut, chocolate
Peach crumble
Rum raisin
Ginger with caramelized pears and roasted macadamias
Strawberry rhubarb pie

So the poll is now up at the top of my blog! Vote for your favorite flavor for development by Three Twins. Only one vote per person (choose wisely). The poll closes July 6th at 6:00pm, and the winner will be announced shortly after.

Transit Time

Everyone who's coming to look at the yummy ice cream flavors, spoiler alert: don't read this posting. It's not appetizing, and it's not about how long it's going to take you to drive to get ice cream. What we are learning is both the nutritional aspects of what we eat, and how to make it. So of course our course wouldn't be complete without a lecture on "Digestive Wellness." Sure enough, that rolled around this week. It even merited two full class days (Thai cooking, seafood and sauces on the other hand, all were only one... this is one culinary school where how appetizing a subject is clearly doesn't pull rank).

With cleanses all the rage, one of the things we talked about was "transit time" -- i.e. how long from in to out. To break it down, what you consume should take about 1 minute in your mouth, 2 - 3 seconds in your esophagus, 2 - 4 hours in your stomach, 1 - 4 hours in your small intestines and 10 hours - 3 days in your large intestines. Of course, certain things take longer than others (and I found this fascinating). How long what you ingest stays "in residence" in your stomach falls into approximately the following rank order:

- Liquids: within a few minutes
- Fruits: 1 - 2 hours
- Veggies: a little longer
- Starches and grain: longer
- Legumes: longer still
- Protein: 3+ hours
- Fat: Longest

In total, transit time should be between 18 and 24 hours ideally. How can you test this? Eat 2 tablespoons of sesame seeds and keep a watch out for when they show back up. See, I warned you it wouldn't be appetizing. I'm going to leave it to other sources to tell you what to do if it takes the little buggers too long to show up... plenty of info out there and I'm not looking to become a specialist.

Friday, June 26, 2009

Recipe: Classic Tomato Gazpacho with Croutons


Tomorrow I have to do a 15 minute "class presentation" of a recipe that demonstrates medium dicing, toasting and using a mortar and pestle. Since tomatoes have just come into season, I thought a gazpacho topped with croutons would be perfect -- I can use the mortar and pestle to make a garlic paste, and demonstrate the knife skill and toasting with the croutons. The only trick was to create a version that could come together (and taste good) in only 15 minutes. Here's what I developed (you're getting a sneak peek of my class handout).

Classic Gazpacho with Croutons

Gazpacho is typically better the next day, after the flavors meld. For this quick and easy version that tastes good right away, I used bottled tomato juice, plenty of vinegar and a garlic paste to provide an instant flavor base. You can make this gluten-free by substituting gluten-free bread.

Ingredients

Soup:
2 cups peeled and diced (1/4 inch) hothouse cucumber, seeded
2 cups diced (1/4 inch) bell pepper (red, yellow or orange)
2 cups diced (1/4 inch) ripe tomato
1/2 cup diced (1/4 inch) red onion (soaked in water and a bit of vinegar for at least 20 minutes - this makes raw onion much more palatable by removing the strong aftertaste)
2 cups high-quality tomato juice (Knudsen recommended)
1/2 cup red-wine vinegar
1/3 cup extra-virgin olive oil
1/4 cup cilantro, chopped
1 clove garlic
Sea salt and pepper, to taste

Croutons:
3 slices bread, medium diced
4 tablespoons olive oil
Salt to taste

Optional: Seasoned sea salt to rim glass

Directions

1) Preheat oven to 400 degrees. Toss bread with olive oil and salt, spread on baking sheet lined with parchment paper, and place in center of oven. Toast approx. 10 minutes (or until golden brown), turning once. Remove and allow to cool.
2) While croutons toast, place the diced vegetables in a large bowl. Add the tomato juice, vinegar (reserve a few tablespoons), oil and cilantro (reserve a bit for garnish).
3) In a mortar and pestle, mash garlic with salt and 3 croutons. Add to soup mixture.
4) Transfer half of the mixture to a blender and pulse to coarsely puree. Return to the bowl, and stir to combine. Season with salt and pepper and remaining vinegar if needed (it should taste almost spicy from the vinegar, but not be overly acidic).
5) For serving, rim glasses in seasoned salt if desired. Garnish with croutons and cilantro.

Servings: 4 - 6 bowls. Adapted from “Farmstand Gazpacho,” Parade Magazine, June 2008.

Nutritional Information:

Tomatoes – Contain lycopene (a red carotene) that prevents diseases (including cancer and heart disease) by neutralizing harmful oxygen free radicals before they can do damage to cellular structures.

Cucumber – An excellent source of silica, a trace mineral that contributes to connective tissue strength.

Bell peppers – Protective against cataracts (possibly due to vitamin C and beta-carotene). Capsaicin, flavonoids and vitamin C also shown to prevent blood clots and reduce risk of heart attacks and strokes (similar to chili peppers, though not as concentrated).

Tuesday, June 23, 2009

Landmark Meals

Life's landmarks aren't complete without memorable celebratory meals. Starting the public countdown to three such meals coming up, including an October foodie pilgrimage:

1) Ubuntu - This Napa "vegetable" restaurant is drawing raves for it's innovative cuisine, which is vegetarian but doesn't make you feel "deprived." My classmate Shannon raves about their cauliflower dish (of course). I'm lucky to have my Aunt Nancy visiting from NY shortly after my birthday, and we're both looking forward to a meal here. On the train into work this week I came across a review in this month's O Magazine.

2) Final Showcase - As the culmination of our program, my class will be serving up a final showcase meal to which we're each allowed to invite two guests. The planning is already in full force, though it's not until the end of August. More on that in future blog posts, as we essentially attempt to open a restaurant for a night.

3) El Bulli - In Spain, about two hours drive from Barcelona up along the coast by France, El Bulli reigns supreme. Ranked the #1 restaurant in the world for the 4th year in a row, El Bulli gets 1,000,000 res requests/year. Only 8,000 get in -- including my former roomie Dave, whose offer of a seat at his table is like sharing a winning lotto ticket (I pretty much hyperventilated... for about 20 minutes). His reservation is for Monday, October 19th. What could be a more perfect culinary school graduation celebration than a once-in-a-lifetime Foodie Mecca pilgrimage?

If anyone has been to Ubuntu or El Bulli, I'd love to hear about it!

Monday, June 22, 2009

Recipe: Pad Thai

I've always wanted an easy Pad Thai recipe, so when I made this one in class and it was not only simple but delicious I was ecstatic. The only ingredient I've found difficult to track down is the palm sugar. Palm sugar is healthier but if you can't find it experiment with a mix of brown sugar and white sugar or sucanat. I made a very quick cucumber salad as a side with chopped english cucumber in seasoned rice vinegar and a touch of agave syrup.

Ingredients
1 package Pad Thai rice noodles
½ cup tamarind juice (if you buy paste, mix it with warm water to reconstitute)
¼ cup palm sugar
½ cup fish sauce
1 tsp chili powder
2 Tbs coconut oil
2 shallots, minced
4 cloves garlic, minced
2 eggs, beaten
2 cups bean sprouts
3 scallions, thinly sliced
¼ cup peanuts, chopped
1 small bunch cilantro, chopped
2 limes, sliced

Procedure
1 Soak the dry noodles in lukewarm water for 15-20 minutes, until flexible but not soft. Drain and set aside. In the meantime, prepare the rest of the ingredients.
2 In a small saucepan on medium heat, add the tamarind juice, palm sugar, fish sauce, and chili powder. Bring to a simmer until the palm sugar dissolves. Turn off heat and set aside.
3 Have all of your ingredients organized next to the stove. Heat a wok on medium-high heat until hot. Add the coconut oil and immediately add the shallot and garlic stir until they start to brown but make sure they don't burn. Add the noodles to
the wok. Stir quickly to keep things from sticking. Add tamarind mixture and stir until the liquid evaporates. If it still seems a little dry, add some water. Make room for the egg by pushing all noodles to the side of the wok. Pour the egg into
the wok and scramble it until it is almost all cooked. Fold the egg into the noodles. Add the bean sprouts and scallions. Stir a few more times. The noodles should be soft and tangled at this point.
4 Pour onto the serving plate and sprinkle with peanuts and cilantro. Garnish with sliced lime.
(source: Bauman College Staff)

Tuesday, June 16, 2009

Three Stone Hearth Fieldtrip - Intro to Weston Price and CSKs

Ever heard of a Community Supported Kitchen (CSK)? I hadn't until this Tuesday, when we went to visit the one called Three Stone Hearth in Berkeley, CA.

What is a CSK? It builds off of a growing trend in community-supported food suppliers, though the more commonly known version is a CSA, or Community Support Agriculture. The website LocalHarvest provides a handy central resource for anyone looking for more info on CSAs, which they define as:

...a popular way for consumers to buy local, seasonal food directly from a farmer. Here are the basics: a farmer offers a certain number of "shares" to the public. Typically the share consists of a box of vegetables, but other farm products may be included. Interested consumers purchase a share (aka a "membership" or a "subscription") and in return receive a box (bag, basket) of seasonal produce each week throughout the farming season.

With its history of generating new food movements (a la Chez Panisse), it's not surprising Berkeley also served as the birthplace for Three Stone, which I was told was the one and only CSK, but it looks like they have competition (though not really, since this one's in Portland).

We were given a background talk on Three Stone, toured the facilities, and spent four hours helping in the kitchen. To add to its one-of-a-kind vibe, Three Stone is in the cavernous space that previously housed my favorite Thai grocery store, Tuk Tuk (as in the mini-bus like vehicle used in Thailand). Half the space is still filled with Thai groceries and an actual Tuk Tuk bus. The other half is Three Stone Hearth, buzzing with music and volunteers, and saturated with slow-cooked, nutrient-rich food scents.

Our field trip also introduced us to Dr. Weston A. Price. Ever heard of him? Don't feel bad if you haven't, just like a CSK, I was clueless about this diet guru, called the "Charles Darwin of Nutrition." A Cleveland dentist in the early 1900s, Price traveled the world studying isolated human groups showing healthier traits and observing their diets in a quest to understand the causes of physical degeneration (including dental decay). Three Stone Hearth "follows the guidelines for human nutrition that were developed and discovered by indigenous and traditional peoples around the world and recorded by Dr. Weston A. Price." Among the guidelines Price set forward which you can learn more about at their website:

  • Nutrient density
  • Liberal use of traditional fats
  • Raw and cultured dairy products
  • Whole grains that have been soaked, sprouted, soured or naturally leavened
  • Use of natural and unrefined sweeteners only, balanced by fats and proteins or lacto-fermented
  • Animal products from pastured livestock
  • Avoidance as much as possible of processed and chemical ingredients and toxic substances

None of these guidelines seem revolutionary. If we weren't all eating so much processed food of uncertain origins, we wouldn't need constant reminders of what "real" wholesome food is. But regardless, it's clear that Three Stone's food is high quality, and that they are extremely careful about sourcing ingredients. We were told some customers use them as a stepping stone from eating vegetarian back to eating animal protein, because they can be reassured Three Stone's meat is of the best quality. For individuals who want delicious, wholesome prepared foods but don't cook, I could also see Three Stone being a good option. Or for someone who's ill and looking for food at its most nourishing.

Three Stone does a weekly menu. My favorite thing was the Meaty Pint... exactly as it sounds, a delectable pint of extremely meaty stew. In our case, it had tons of chicken spiced with a Moroccan blend and studded with olives and raisins. We also made incredible coconut macaroons that were wheatfree and sugar free. I notice they have cherry cheesecake on this week's menu -- my all time favorite dessert. Unfortunately, their food, due to its quality, does not come cheap. One tin of cheesecake will run you $20. Three Stone is an exciting new type of food business with scrumptious offerings though, and one that those living close-by should consider checking out if their budget allows.

Thursday, June 11, 2009

Hidden Sugar

I’ve been consuming sugar unwittingly at every step, even as I try not to. Even at dinner last night in my entrée. Though I’m trying my best to stay away from the stuff since it’s unhealthy and makes me feel awful, it’s nearly impossible because it’s being hidden everywhere. I was so disgusted when I dug into my first mouthful of chicken stir fry last night at a local Thai restaurant and realized it was sugared that I decided to do some research and make the topic of hidden sugar my next blog post. I’m not dogmatic, so this is not to say you should never eat sugar. A little is normal (sugar does occur naturally and its unrefined form doesn’t impact your body as much). But my point is that it shouldn’t be so difficult to avoid, especially when it’s hidden in foods you wouldn’t even want it in.

Scary facts:
  • One in 3 Americans born after 2000 will contract early-onset diabetes, according to research cited in Food Inc. (opening in theaters Friday, review here).

  • Prior to the turn of the century, the average consumption was only 5 lbs per person per year.

  • According to the same site that provided the stat above, in the past 20 years, Americans have increased sugar consumption from 26lbs to 135lbs per person per year (I saw numbers as high as 170lbs per person per year elsewhere).

That’s a phenomenal accomplishment, and one that’s making a lot of us sick without even realizing it.

Where is sugar being hidden?

For my Thai dinner, I tried to order healthy – a green bean salad and stir fry in a spicy basil sauce. All was well until I tasted the stir fry and realized it was suspiciously sweet. Then my mind went back to our native Thai classmate Komoot saying Thai restaurants here add sugar. I asked my waitress whether there was added sugar. Sure enough. There was. Who would think to say “No sugar please” when ordering a chicken entree? So word to wise, when you go out for Thai, request no sugar (you should also request no MSG, but that’s a whole other story).

And beyond sneaky sugar in restaurant dishes is another other level of treachery from those who profit from the consumption of sugar. For the food industry, sugar is cheap to produce, and the cheaper the calorie, the bigger the profit margin, so they try to slip more and more of it past us. One way to do this is by including multiple forms of sugar in a single food. Since food labeling practices specify listing ingredients in order of amount, if the “sugar” is divided into multiple varieties, all of a sudden it drops down the list lurking in pseudonyms. It may still be the first or second ingredient, but it’s much harder to tell that what you’re eating is almost all sugar.

If you see these on a label, you’re eating sugar:

  • Cane juice, caramel, barley malt, ethyl maltol, maltodextrin, maltose, mannitol, sorbitol, refiner's syrup, all fruit juice concentrates (including grape, apple, pear juices), all “ose” (including dextrose, fructose, lactose, galactose, glucose, maltose and sucrose), the “corns” (corn sweetener, corn syrup, high-fructose corn syrup) honey, invert sugar, syrups Bulleted List(malt, maple, rice, sorghum), molasses, raw sugar, turbinado sugar, brown sugar, white sugar, yellow sugar, beet sugar, and of course just plain sugar.

Places to be especially aware of hidden sugar:

  • Cereals (duh), baby foods, nut butters, bread, spaghetti sauce, nutrition bars, "health" drinks, microwave meals, sauces (especially ketchup and bbq), salad dressings, restaurant food (especially fast food and ethnic cuisines that use sweet and spicy flavors like Thai) and yogurts.

Why is sugar bad anyways?

  • Contributes to weight gain/diabeties: In our image conscience society, you would think more people would realize that sugar leads to weight gain. Sugar is purely empty calories – no nutritional value whatsoever. Nada. Zero. Zilch. Even fat in certain forms is healthy and should be consumed to keep your body functioning properly (those who aren’t getting enough fat can actually show signs of diminished ability to process thoughts, i.e. early senility). Yet, “low fat” products often take out the fat and up the salt and sugar in its place. They don’t actually satiate appetite without fat, so you consume more, and in the process you get all those lovely empty sugar calories that turn into fat anyways. Good times, huh? It’s one thing to put on a few extra pounds, but we’re not only talking superficial appearances here. Overconsumption of sugar contributes to both obesity and diabetes, which can be deadly. And as I already mentioned, one in 3 Americans born after 2000 will contract early-onset diabetes.

  • Makes you feel gross: That initial sugar rush may be fun, but after you’re probably not gonna feel so hot. Sugar can contribute to hyperactivity, anxiety, depression, concentration difficulties and crankiness. These things are especially pronounced in children.

  • And the list goes on: Sugar also suppresses the immune system, elevates harmful cholesterol levels, can cause hypoglycemia, causes toxemia during pregnancy, headaches (including migraines), increased risk of blood clots and strokes, kidney and liver damage, increased risk of heart disease, tooth decay and inhibited absorption of minerals such as calcium.

Where can I learn more?

See Food Inc. -- An eye-opening film about the workings of our food industry and its affects on American's diets, including sugar consumption.

Some helpful online reading:

http://www.healingdaily.com/detoxification-diet/sugar.htm

http://yourtotalhealth.ivillage.com/finding-hidden-sugar.html

http://www.healthcastle.com/diabetes_sugar_101.shtml

http://www.merchantcircle.com/blogs/Fit.And.Fine.Wellness.For.Life.678-290-3160/2008/9/6-Foods-with-Hidden-Sugar/123104

Wednesday, June 10, 2009

Shout out to Kasey

A member of our Bauman Natural Chef PM class community is dearly missed these days. Kasey is recovering from surgery on her hand following a bike accident. She's kept our acts together, making sure the pantry is stocked, snack served, ingredient trays properly arranged, and keeping things generally entertaining. She even indulges us with a laugh when we list things like "Pig Trotters" on the groceries needed list.

Everyone misses you and wishes you a speedy recovery Kasey! We're a bit lost without you (seriously, you should have seen us trying to figure out who had what clean up task last class, of course no one would admit to it being their turn at washing dishes).

Everything I ever needed to know I learned as a catering intern

In today's NY Times there was an article painting the blogosphere as a ghost town populated by former best intentions. According to a study quoted:

"...only 7.4 million out of the 133 million blogs the company tracks had been updated in the past 120 days. That translates to 95 percent of blogs being essentially abandoned, left to lie fallow on the Web, where they become public remnants of a dream — or at least an ambition — unfulfilled."

After a crazy week, I can understand how this happens. With visitors from Israel, midterms and my former roommate's wedding, something had to give, and that thing was the blog (and sleep). This morning I woke up rested (finally) and ready to write. I love to write, I love to cook, and I will continue to blog damn it. So here's a catch-up blog on my catering adventure.

Everything I ever needed to know I learned as a catering intern:
From assisting Back to Earth at a recent wedding

  • Sharpen your knives: The chefs sharpened their knives between almost every task -- at least three times over the course of four hours cooking. This was the most eye opening thing to me. We know it's important to sharpen our knives. But somehow the act is intimidating. As if running the blade is going to send off sparks that will burn down the house, you'll injure yourself, or you'll ruin your knives. Most people use knives until they are dull remnants of the former selves. Some take them to farmers market sharpeners. Some try to tackle the job at home. But here's the honest truth: sharpening knives is neither difficult nor expensive. Really. I bought a $30 diamond sharpening steel and have been using it to great success. Ask a local kitchen store which sharpener is right for your knives (there are different needs for German knives vs. Japanese, etc). They may demonstrate for you, or look it up sharpening basics online. But you should be sharpening your knives almost daily, depending on how much you cook.
  • Less is more: Simple is a buzz word lately. Think "Real Simple" the magazine, and everyone's desire to get "back to the basics." In cooking it can be difficult to keep things simple, but the truth is you don't really need that much equipment or complicated ingredients. We worked with five of us in a tiny outdoor kitchen on dishes that had a limited list of ingredients, but in which each ingredient was the very best quality possible, and the end result was the best catered food I've ever tasted.
  • Don't do a hack job: I was given bunches and bunches of parsley and basil to chop. Having always seen people run a knife over herbs repeatedly, I started going at it. One of the chefs was kind enough to show me that with herbs, no matter how small, you need to have your (very well sharpened) knife slide through to make a clean cut as you hold the herbs bunched with your hand. Do not go back over them repeatedly on the cutting board with your knife. This makes them turn color and become bitter, and negatively impacts the flavor of your dish.
  • Do cut the cheese: Or to be more polite, think of how to make the guest feel comfortable. I was surprised to see one of the chefs cutting a wedge into each oversize block of cheese on a gourmet cheese board until he explained that this made everyone more likely to dig right in. I thought this was a brilliant party tip.

Okay, so maybe this isn't everything I ever needed to know. But it was a phenomenal experience learning some cooking basics that go way beyond classroom knowledge.

Friday, June 5, 2009

Hallelujah! Midterm Secret Ingredients Answer My Prayers

In my last post I wrote "...fingers are crossed that one of the ingredients we get is the stone fruit that's in season." Well guess what, I got cherries! A bagful of glistening ruby beauties with an abundance of juicy flavor that begged to be tucked into the spelt flour galette crust recipe I'd memorized in preparation.

My surprise challenge was to use the following:
Cherries, sweet potatoes, kale (ingredients)
Battonet, braise, cast iron skillet (method/equipment)

We spent time up front brainstorming. I sketched out a menu of two different galetes: one savory and one sweet, as well as fries (those would tick off my sweet potatoes, battonet knife cut and use of the cast iron skillet). From there, we had 90 minutes in the kitchen, along with our sous chefs, to make everything. I'm forever in debt to Shannon for pulling off the perfect galette pastry. Though I wrote out the specs, it was her implementation. As she worked on making the dough and rolling the mini pies out, I created fillings, and hacked up the darn potatoes, then fried and spiced them.

My final menu:
--Sweet galette, cherries macerated in cinnamon, almond extract, a sprinkling of sea salt, succanat (alternative sweetener) and arrowroot (to thicken). Garnished with pistachios.
--Savory galette, "mini pizzas" with tomato sauce, braised leeks and kale with garlic and oregano. Garnished with cheese topping and oregano.
--Marscapone and goat cheese combined as topping for both. This was a nice way to "bridge" the concept together.
--Sweet potato fries with garlic chili salt.

Unfortunately I forgot my camera, but should have photos thanks to my classmate Lara to post later.

Thursday, June 4, 2009

Midterms! Go Team ShoShan

Hard to believe it, but midterms are upon us. My "iron chef" style challenge is about to begin... 3 surprise ingredients, 3 surprise skills and 90 minutes to create delicious food (we can make any number of dishes we want to take on).

Luckily, I have a rock star sous chef, Cauliflower Queen Shannon herself. She's dubbed us "Team ShoShan." My fingers are crossed that one of the ingredients we get is the stone fruit that's in season. I have a baking project I'd love to use them for, but who knows what's in the cards! I will post a complete report along with photos of our creations, though it likely not until next week since I'm off to LA this weekend for my roommate's wedding.

Saturday, May 30, 2009

Fun with Food (or what happens when culinary students get bored...)

What happens when culinary students have too much downtime on their hands? They have "fun with food." In Japanese class, as we waited for rice to cook we occupied ourselves taking silly photos. Click on the "Fun with Food" photo album to see them all.

Thursday, May 28, 2009

Recipe: Black Bean Brownies

This weekend, in anticipation of a dinner party, I stayed up Saturday night until 2:30am baking black bean brownies. Bizarre, right? You don't taste the black beans when they're done though, and when you think about Asian desserts, beans aren't that weird.

The benefits of these brownies (other than hidden iron and fiber) are:
  • They are flourless (hello gluten intolerant folks)
  • Have no refined sugar (hello diabetics, hypoglycemics, etc.)
  • And it's just pure fun freaking people out when you tell them what's in them.
Originally from the baking book Baking with Agave Nectar, I grabbed the recipe from the food blog 101cookbooks.com, where they seem to be all the rage judging from the comments section. A few things I did... I was short on agave syrup, so I used 1 cup agave, and a half cup of wildflower honey. The honey had delicious flavor, which I think enhanced the brownies. I also used espresso powder instead of instant coffee.

The "brownie" that results tastes more like fudge than a brownie really. Since it's crumbly at first, it helps to refrigerate it before cutting pieces, ideally overnight.

Wednesday, May 27, 2009

Sweet and Savory

Baking class photos, both sweet baking (galettes, cake, etc.) and savory (pizzas, bread, biscuits) will be up shortly. I'm way behind on photos but hope to catch-up on Mediterranean and Thai Class photos as well this week. We're already three classes into our Ethnic Cuisine unit, and approaching "Iron Chef" style midterms next week.

Have You Seen These Vitamixes?


We all showed up post-holiday weekend feeling a little off. It was the first time since starting classes we had a weekend away! Everyone was happy and ready to dive in to Thai Class when we discovered the laptop (normally attached to our lecture projector) missing. Maybe someone locked it away over the break? But then we started noticing other little things missing-- a juicer gone, a Kitchenaid stand mixer, and two Vitamixes. If you haven't seen a Vitamix, they look like an industrial-sized blender from the 70s. But these powerful machines are the Rolls Royce of food appliances, and carry an appropriately royal price tag as well. Could we have been robbed? The office desktop computer and mammoth-sized copy machine were also gone (these were no lazy burglars), and then a window bar was discovered broken. That pretty much confirmed it.

As we started cooking our Pad Thai, Red Curry Vegetables, Thai Iced Tea, green papaya salad, and other goodies, the cops were called. One lone officer showed up. He checked the place out, confirmed our suspicions (the window ledge had been wiped clean of footprints even), and left too early for dinner (poor him).

What I really want to know is what robbers are aware of the value of Vitamixes? After all, they left the food processors which had been right next to them behind! All really odd if you ask me. Somewhere in Oakland right now thugs may be pawning a juicer, Kitchenaid or those Vitamixes. Either that, or they're having a huge cake baking and margarita mixing party.

ps-- In other weird news I made "black bean brownies" this weekend. They were actually fudgy and incredible, as weird as that sounds (you'd never know what was in them). Posting with the full recipe and baking tips soon.

Friday, May 22, 2009

Drink Your Kale (Recipe) + Externship Update

Writing my galette baking posting got me in trouble... I started craving sweets immediately after and went for my chocolate stash. The next morning the craving was still there and, since I didn't have any galettes in the house, I resorted to ice cream (malted peanut toffee fudge). What says you're living life to its fullest better than pulling a pint out at 7am? Since my brain doesn't work before about 10am, I had the added bonus of not thinking enough to feel guilty until later.

That was yesterday. Today, fired by a deep sense of regret I pulled out the blender and made a smoothie. But not any old smoothie. This was the mother of all healthy "I'm going to wash all the scum out of your system and replace it with easily absorbable liquid nutrients" frosty breakfast beverages. I've heard more and more talk lately of blending kale into smoothies -- which set off my "weird ingredient" alarms (I still have some healthy eating hang ups. Drinking vegetables is one of them). But my friend Courtney said she does it, and I stumbled on a recipe (which I can no longer find...oops!) with it while looking at my classmate's blog recently. What better way to balance out having ice cream for breakfast one morning than with a kale-spiked smoothie the next? And it was pretty good! I'll drink my kale again, except without berries next time because those little tooth coating seed buggers made it an embarrassing commute to work today. By the way, this alarmingly green smoothie in the photo is not mine (mine was not green, it only had little green flecks). Just as I don't think before 10am I certainly can't function well enough to garnish or remember to snap a shot.

Now for the externship update... I had a meeting with the catering company, Back to Earth, where I'm "externing" yesterday. They were one of the first catering companies in the Bay Area to pioneer seasonal organic catering and have a stellar reputation, so I'm thrilled to learn from them and excited to put in my first hours next Saturday (at a wedding in San Francisco).

Breakfast Smoothie

Ingredients
1 cup almond or "real" milk
1 tbsp nut butter (For extra protein. I used almond)
1 tsp ground flax seeds (for their omega-3s and fiber)
1/3 cup frozen fruit, optional (I used berries but would recommend mango instead)
1/2 frozen sliced banana (Or use non-frozen, but it won't be as thick)
1 tbsp agave syrup, honey or one pitted chopped date (Add more liquid sweetener or date to taste if you'd like it sweeter)
4 kale leaves, rinsed, stem removed and chopped
Cinnamon to taste (optional, the recipe that inspired me used it but I forgot it completely)

Procedure

Blend all at top speed, stopping to push ingredients down if needed to get everything combined.

Thursday, May 21, 2009

Dueling Dates

It's always nice to have options, especially when it comes to dates. I can't help you with your love life if that's what you were hoping for (and I'm not going to reveal any juicy scoop on mine, sorry). But I can share two very good dueling stuffed date (as in the medjool kind) recipes.

Tonight was Western Mediterranean Class. We made Moroccan cous cous, harissa spiced carrots and homemade pita, among other phenomenal recipes. It was my favorite class so far. If I could only cook one cuisine, this would be it. For dessert, there was mint tea and a sweet version of stuffed dates with yogurt, mint and orange zest. When I entertain a signature appetizer of mine is a savory version of a similar recipe -- I call them "Date Bon Bons." Here are the recipes for both!

Date Recipe #1: Savory Date Bon Bons

This appetizer is an easy single bite that artfully combines the intense sweetness of the date and saltiness of the prosciutto. The goat cheese adds a creaminess and the basil heightens all the flavors. Using basil struck me as weird before I tried it, but believe me it's a key ingredient. And if you want to make them vegetarian, use the basil without the prosciutto as the wrap. These are extremely simple and can be prepped ahead, then broiled at the last minute.

Ingredients

1/3 cup soft herbed goat cheese
16 Medjool dates, pitted
16 large basil leaves
4 wide, thin slices prosciutto di Parma, each cut into 4 long strips
16 toothpicks, soaked in water 10 minutes

Procedure

1 Heat broiler to low.
2 Spoon 1 teaspoon cheese into each date; wrap with a basil leaf, then a prosciutto strip. Secure with a toothpick.
3 Broil until cheese bubbles, about 3 minutes. Serve warm.

Nutritional analysis per serving: 187 calories per 2 dates, 3 g fat (1.9 g saturated), 36 g carbs, 3.3 g fiber, 6 g protein

Source: Self Magazine, December 2007

Date Recipe #2: Sweet Lebneh Stuffed Dates

Ingredients

24 medjool dates, split on the top and pit removed
1 cup yogurt cheese (Lebneh), make the night before (or skip this step and buy at TJs)
1 orange, zested
1 tsp vanilla extract
½ cup fresh mint, finely chopped
½ cup almonds, toasted and chopped

Procedure

1 To make the yogurt cheese (make the night before), line a fine mesh strainer with a thin linen towel or several layers of cheesecloth. Set over a bowl. Pour the yogurt into the prepared strainer and then gather the edges of the towel together so that the yogurt is covered. Allow to sit in the refrigerator overnight to drain, or for a few days for an even thicker cheese. Or as a short cut, Trader Joes also sells Lebneh.
2 Place the pitted dates on a flat surface. In a bowl, mix together the yogurt cheese, orange zest, vanilla, and mint. Fill each date with some of the mixture. It is easiest to pipe the yogurt mixture into the dates with a pastry bag. Sprinkle the dates with the almonds and serve.

Servings: 12
Author: Jennifer Miller, Natural Chef Instructor/Culinary Administrator

Wednesday, May 20, 2009

Galette Recipe #2: Apple-Marzipan Galette with Caramel

Our blueberry mini galettes in class also made me think of this incredible apple marzipan galette I've made for years, topped with caramelized sugar and vanilla bean ice cream. This recipe is doable for even non-bakers like me. Sharing it as another option, and to show how versatile galettes are.

And my apologies, I am behind on class photos. You can see some baking class photos in my previous post, and I've just added pictures from chicken class. I have the full baking class and first ethnic cuisine album to upload... more soon!

Apple Marzipan Gallete with Caramel and Vanilla Bean Ice Cream

The original recipe calls for sugar, but you can reduce or substitute it. I've always made it as a normal pie size, however it would work just fine to create single-size servings just like the blueberry galettes.

Ingredients

1/2 (15-ounce) package refrigerated pie dough, or make your own if you've got time
Butter (for greasing baking sheet)
1/2 cup marzipan, softened
4 cups sliced peeled Granny Smith apple (about 2 pounds)
3/4 cup sugar, divided
1 tablespoon all-purpose flour
1 teaspoon almond extract, divided
2 teaspoons lemon juice
Dash of salt

Procedure

1 Preheat oven to 425°.
2 Line a jelly roll pan with greased parchment paper. If you want to be extra cautious, sprinkle sugar on as well.
3 Roll dough to a 14-inch circle on a lightly floured surface. Place dough on prepared pan. Roll marzipan to a 9-inch circle on a lightly floured surface. Place marzipan on top of dough. If it's too difficult to roll, I've also just "sliced" it into coins and laid these on top of the dough, which works fine.
4 Combine apple, 1/2 cup sugar, flour, 3/4 teaspoon almond extract, juice, and salt in a large bowl; toss well. Spoon apple mixture over marzipan. Fold 2-inch dough border over the apple mixture, pressing gently to seal (dough will only partially cover apple mixture). I "crimp" the sides with my fingers for presentation.
5 Bake at 425° for 30 minutes or until lightly browned (apple filling may leak slightly during cooking). Depending on your oven, you may want to slightly reduce the temp to 375 the last 10 minutes.

Topping options

Solidified caramel drizzle - Place 1/4 cup sugar in a small heavy saucepan over medium-high heat; cook until sugar dissolves, stirring as needed to dissolve the sugar evenly (about 4 minutes). Cook 1 minute or until golden. Remove from heat; carefully stir in 1/4 teaspoon almond extract. Drizzle over galette.

Caramel sauce - Start as above, but after cooking until golden, remove from the heat, whisk in the almond extract, and also add 1 ounce of butter and 6 tablespoons of heavy cream. Drizzle over the galette.

And of course ice cream!

Galette Recipe #1: Blueberry Mini Galettes with Lemon Curd

Last week’s classes were baking – both sweet and savory. By far my favorite treat of both was a blueberry galette (a pie, only more “rustic"), which I'm sharing the recipe for below. Our version macerated (marinating in acid and spices until the fruit breaks down) blueberries, tucked them into free form crusts to form individual mini pies, and baked until bubbly. As a counter to the sweet berries, we dolloped lemon curd on top. My mom, who loves all things tart and curdy (and once embarrassed me thoroughly during a nice mother's day brunch at the Ritz by asking for more "lemon turd please"), would have loved the full combination. The end result was an extremely flavorful interplay of sweet gooey filling, crispy crust and tangy citrus. And it was reasonably healthy for a dessert, since there was no refined sugar. So yes, you can have your pie and eat it too. Just don't have my mom order it for you at a restaurant.

Blueberry Mini Galettes with Lemon Curd

Galettes can be filled with seasonal fruit and served for dessert, or they can also be made savory and stuffed with vegetables. This recipe uses spelt flour instead refined white flour for the pastry crust. The combination of blueberry and lemon is perfect for early Spring, when both are in season. It would still be very good by itself if you don't want to go to the trouble of making the curd, or topped with ice cream instead.

Ingredients

CRUST
4 cups spelt flour
1 tsp salt
2 Tbs unrefined cane sugar, sucanat (1:1 substitution for regular sugar)
2 ½ sticks butter, cold, cut into pieces
⅔ to 1 cup ice water, as needed

FILLING
4 ½ cups fresh blueberries
3 Tbs arrowroot
1 ½ Tbs lemon zest
1 ½ Tbs fresh lemon juice
¾ tsp cinnamon
¼ tsp salt
¼ cup honey
1 tsp vanilla extract

LEMON CURD
5 large egg yolks
1 large egg
½ cup fresh lemon juice
1 Tbs lemon zest
⅓ cup honey
4 Tbs butter, cut into pieces

Procedure

1 Preheat the oven to 400.
2 DOUGH: Mix together the flour, salt, and sugar together in a bowl. Cut in the butter by hand, leaving some pea-sized chunks. Sprinkle the ice water over the top by the tablespoon and toss it with the flour mixture until you can bring the dough together into a ball. Press it into a disk and refrigerate for 15 minutes.
3 FILLING: While the dough is in the refrigerator, prepare the filling. Mix together the blueberries, arrowroot, lemon zest and juice, cinnamon, salt, honey, and vanilla. Taste and adjust sweetness and lemon flavor as desired.
4 ASSEMBLY: remove the dough from the refrigerator and break into 12 pieces. Roll each piece into a circle about ⅛ inch thick. Transfer onto large parchment lined sheet pans. Add some fruit mixture to the center of the circle and spread, leaving a border 2 to 4 inches wide. Fold the edges of the dough over the fruit, overlapping as you go. Depending on how much of an edge you have left, the galette will be partially or completely covered.
5 Bake for 35 to 40 minutes, until the crust is golden brown.
6 LEMON CURD: In a stainless steel bowl, whisk together the egg yolks and egg, lemon juice, and honey.
7 Place the bowl on top of a pot of simmering water and whisk constantly until pale and thickened, 7 to 10 minutes.
8 Remove from the heat and stir in the butter and lemon zest. Let cool to room temperature.
9 TO SERVE: Put a dollop of the lemon curd on top of each galette.

Servings: 12 - 14 mini pies, or 1 large one
Source: Bauman College